
Host a Dedicated Project Zomboid Server with Unraid
/This is a guide to set up a Project Zomboid dedicated server within Unraid 6.9+. Here you will learn how to get it configured and running for you and your friends to enjoy. You’ve been bitten!
Server Requirements
The server requirements are reasonable. Here are the minimum requirements for 4 players.
An SSD or NVMe cache or dedicated SSD drive with at least 50GB’s of free space
4+ CPU Cores
4GB of RAM + 500MB per additional player
My Server Specs
The container will access resources as needed so there is nothing you need to set.
1TB NVMe Cache
Ryzen 3700x
64GB of RAM
Guide
This guide assumes you have already installed the Community Apps plugin for Unraid and know how to port forward on your router.
Download and Install ich777’s Project Zomboid container.
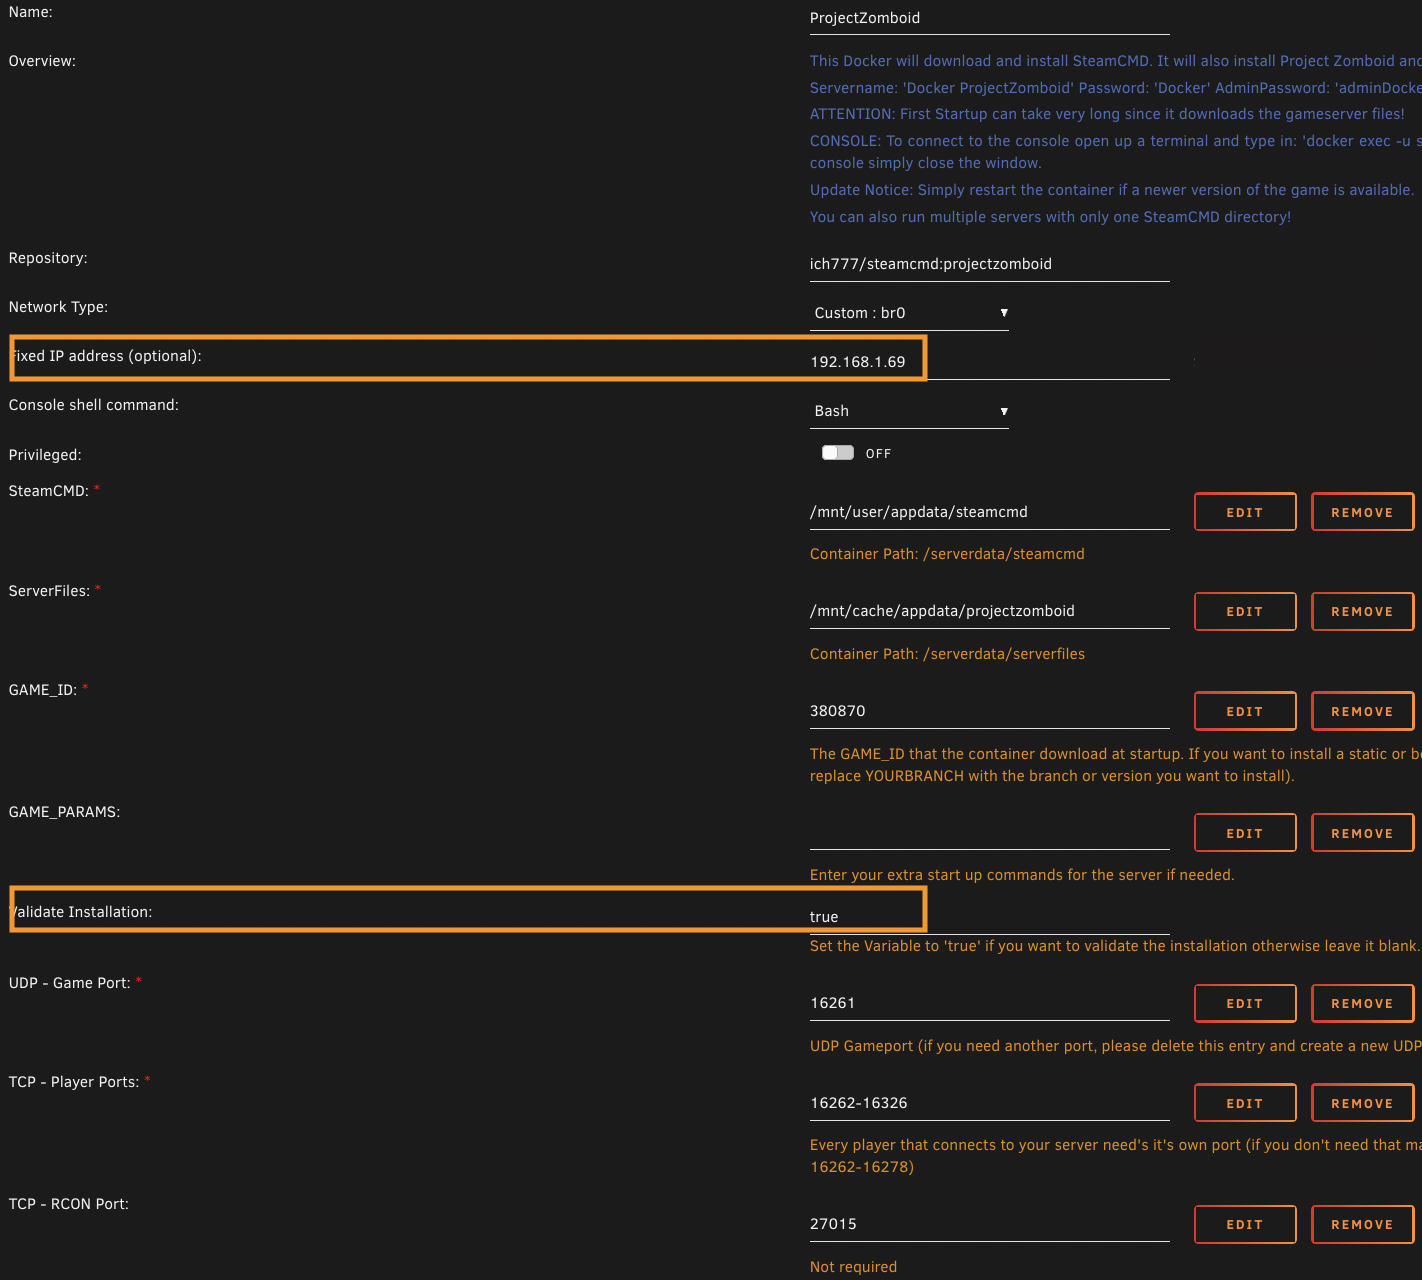
Edit the server container and make the following changes:
Network Type: br0
Fixed IP Address: 192.168.1.69
Validate Installation: true
Done, let the container install and wait several minutes before configuring the server
Here is a visual aide from my setup.
Make your Server Public
Now that you have waited several minutes for the game to download and run you will want to stop the Project Zomboid container so we can configure/customize it. The game files live in the appdata share, in here is where you will need to make your edits.
Stop the container before editing!
Game Files
/mnt/user/appdata/projectzomboid/Zomboid/Server
servertest.ini - This file is for customizing your server
servertest_SandboxVars.lua - This file is for customizing the world and zombies
You can read more about customization here. For now to make a Public viewable server you will need to edit the following items. You can get your WAN/Public IP address from https://www.whatismyip.com/ you will need this for the “server_browser_announced_ip=” portion.
Open=true
Public=true
PublicName=Windows of Death
PublicDescription=Hosted by spxlabs.com using Unraid
Password=Docker
server_browser_announced_ip=69.42.01.33
After you have messed around with all the settings be sure to start the Project Zomboid container so you can start playing.
Port Forwarding
Great now that you have completed everything above, you will now need to forward some ports so other people can join.
16261 UDP - For the game
16262-16326 TCP - You need 1 port per player, this range of ports allows for 64 players
27015 TCP - RCON (optional)
8766 TCP - Steam Server List

Done
How long can you survive?

Prefer Video Guides?
Want to know how to mod Project Zomboid in Unraid? Look no further, just watch this video.
Questions?
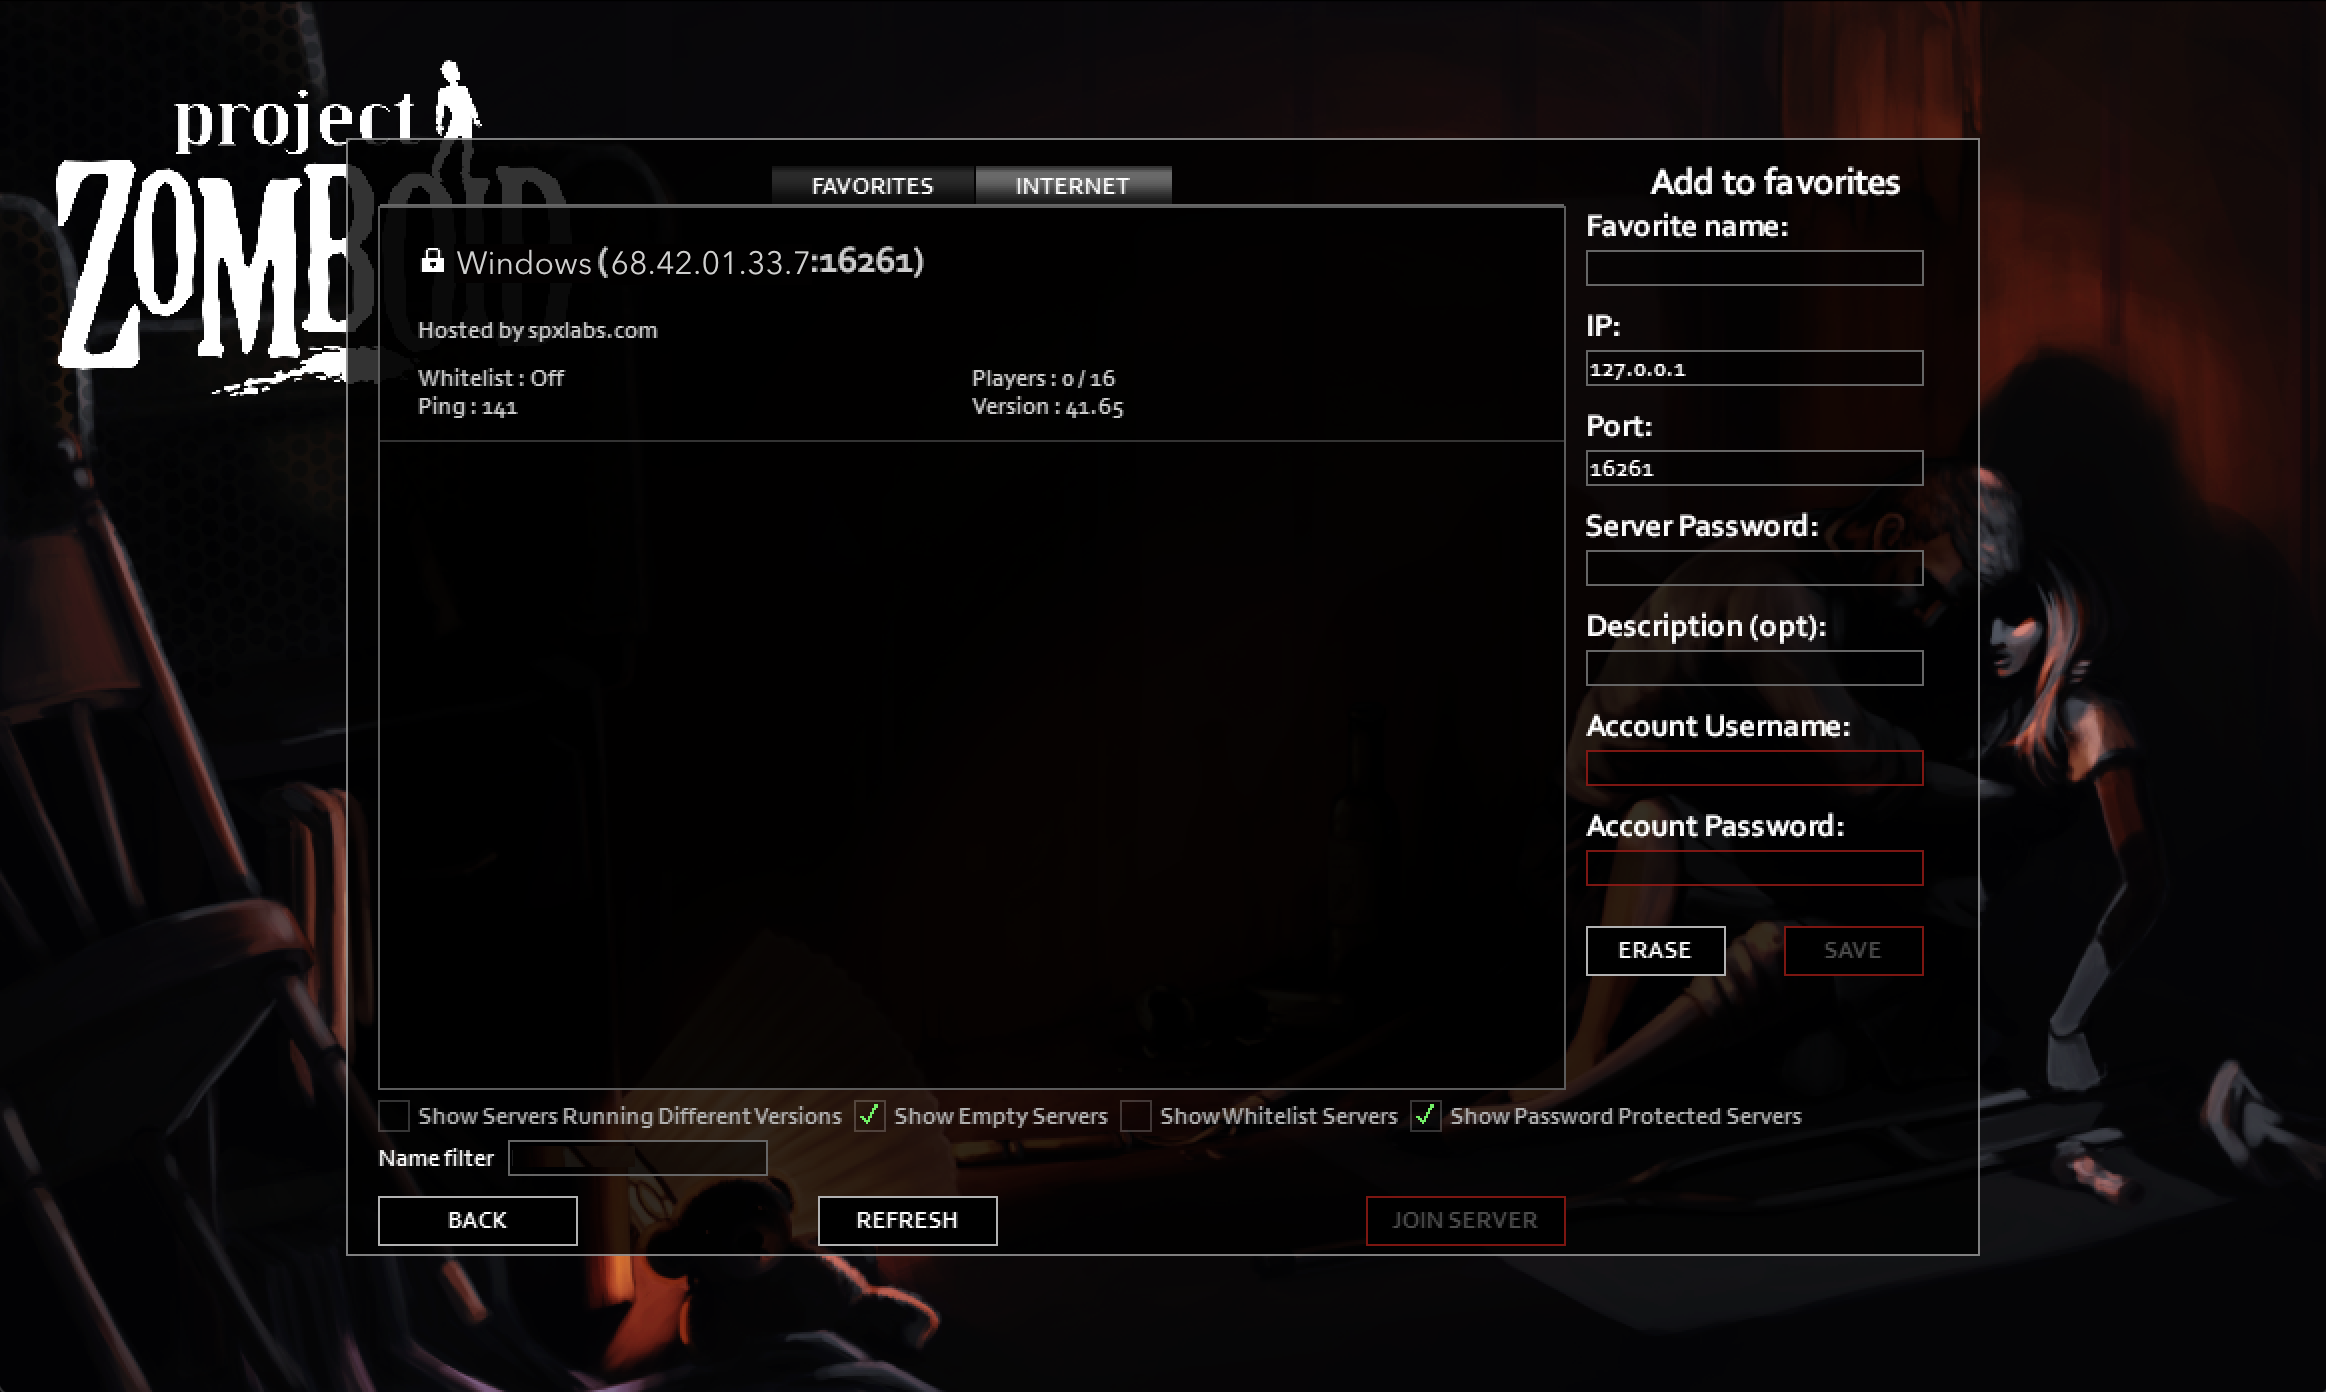
How do I host a private server?
Edit the file servertest.ini
Change “Public=true” to “Public=false”. Then your friends will have to join via your WAN/Public IP Address. It will look something like this
How do I change or remove the server password?
Edit the file servertest.ini
Change “Password=Docker” to “Password=” or “Password=NewPassword”
What is my Account Name and Account Password?
You literally make these up when joining a server for the first time, they can be anything. Account Name is what your characters name will show up as in the server. As example
Account Name = spxlabs
Account Password = unraidRules
My server isn’t appearing in the list of servers!
Make sure all the ports are forwarded correctly. The server may also not be appearing in the list if it has a password, there is a filter for this.
How do I change starting towns?
Edit the file servertest.ini
Map=Muldraugh, KY
Riverside, KY
Rosewood, KY
West Point, KY
Where can I learn more about server settings?
https://pzwiki.net/wiki/Server_Settings
Where can I get additional support with the container?
https://forums.unraid.net/topic/79530-support-ich777-gameserver-dockers/