
Self Hosted Wiki for your Homelab using WikiJS, Docker, and Unraid
/Wiki.JS runs off of Node.JS and is an incredibly simple to use self hosted container that you can deploy on your Unraid server. Unraid makes deploying Wiki.JS easy thanks to the Community Apps plugin.
Documentation Server
Hardly anyone likes documentation until you need to remember how you did something in the past or until someone else needs to know how to access a server, service, or make modifications to a system. Best of all, it is all local to you, so even if the internet is down you can still access your own wiki.
Why should you be documenting information about your homelab?
Assist users to access services in your absence
Leave instructions for users / loved ones on what to do with your information should you meet your demise
Easily find fixes or past information to resolve repeating issues
Create Tables that contain important information about system roles, services, IP’s, location, and more
Display diagrams, videos, documents, voice memos, etc
Let’s users know how to mount Shares, remember username details, or other self help information
Assumptions
Before continuing on to the “how to install Wiki.JS container” portion of this page, first we have to talk about the elephant in the room. That your network already has a DNS operational. There are 100’s of different ways to run a DNS on a network and to keep this page condensed, I will not be writing instructions on how to access your wiki using a hostname or domain name.
You already have a DNS running
You already have the Community Apps plugin install in Unraid
How to Install Wiki.JS
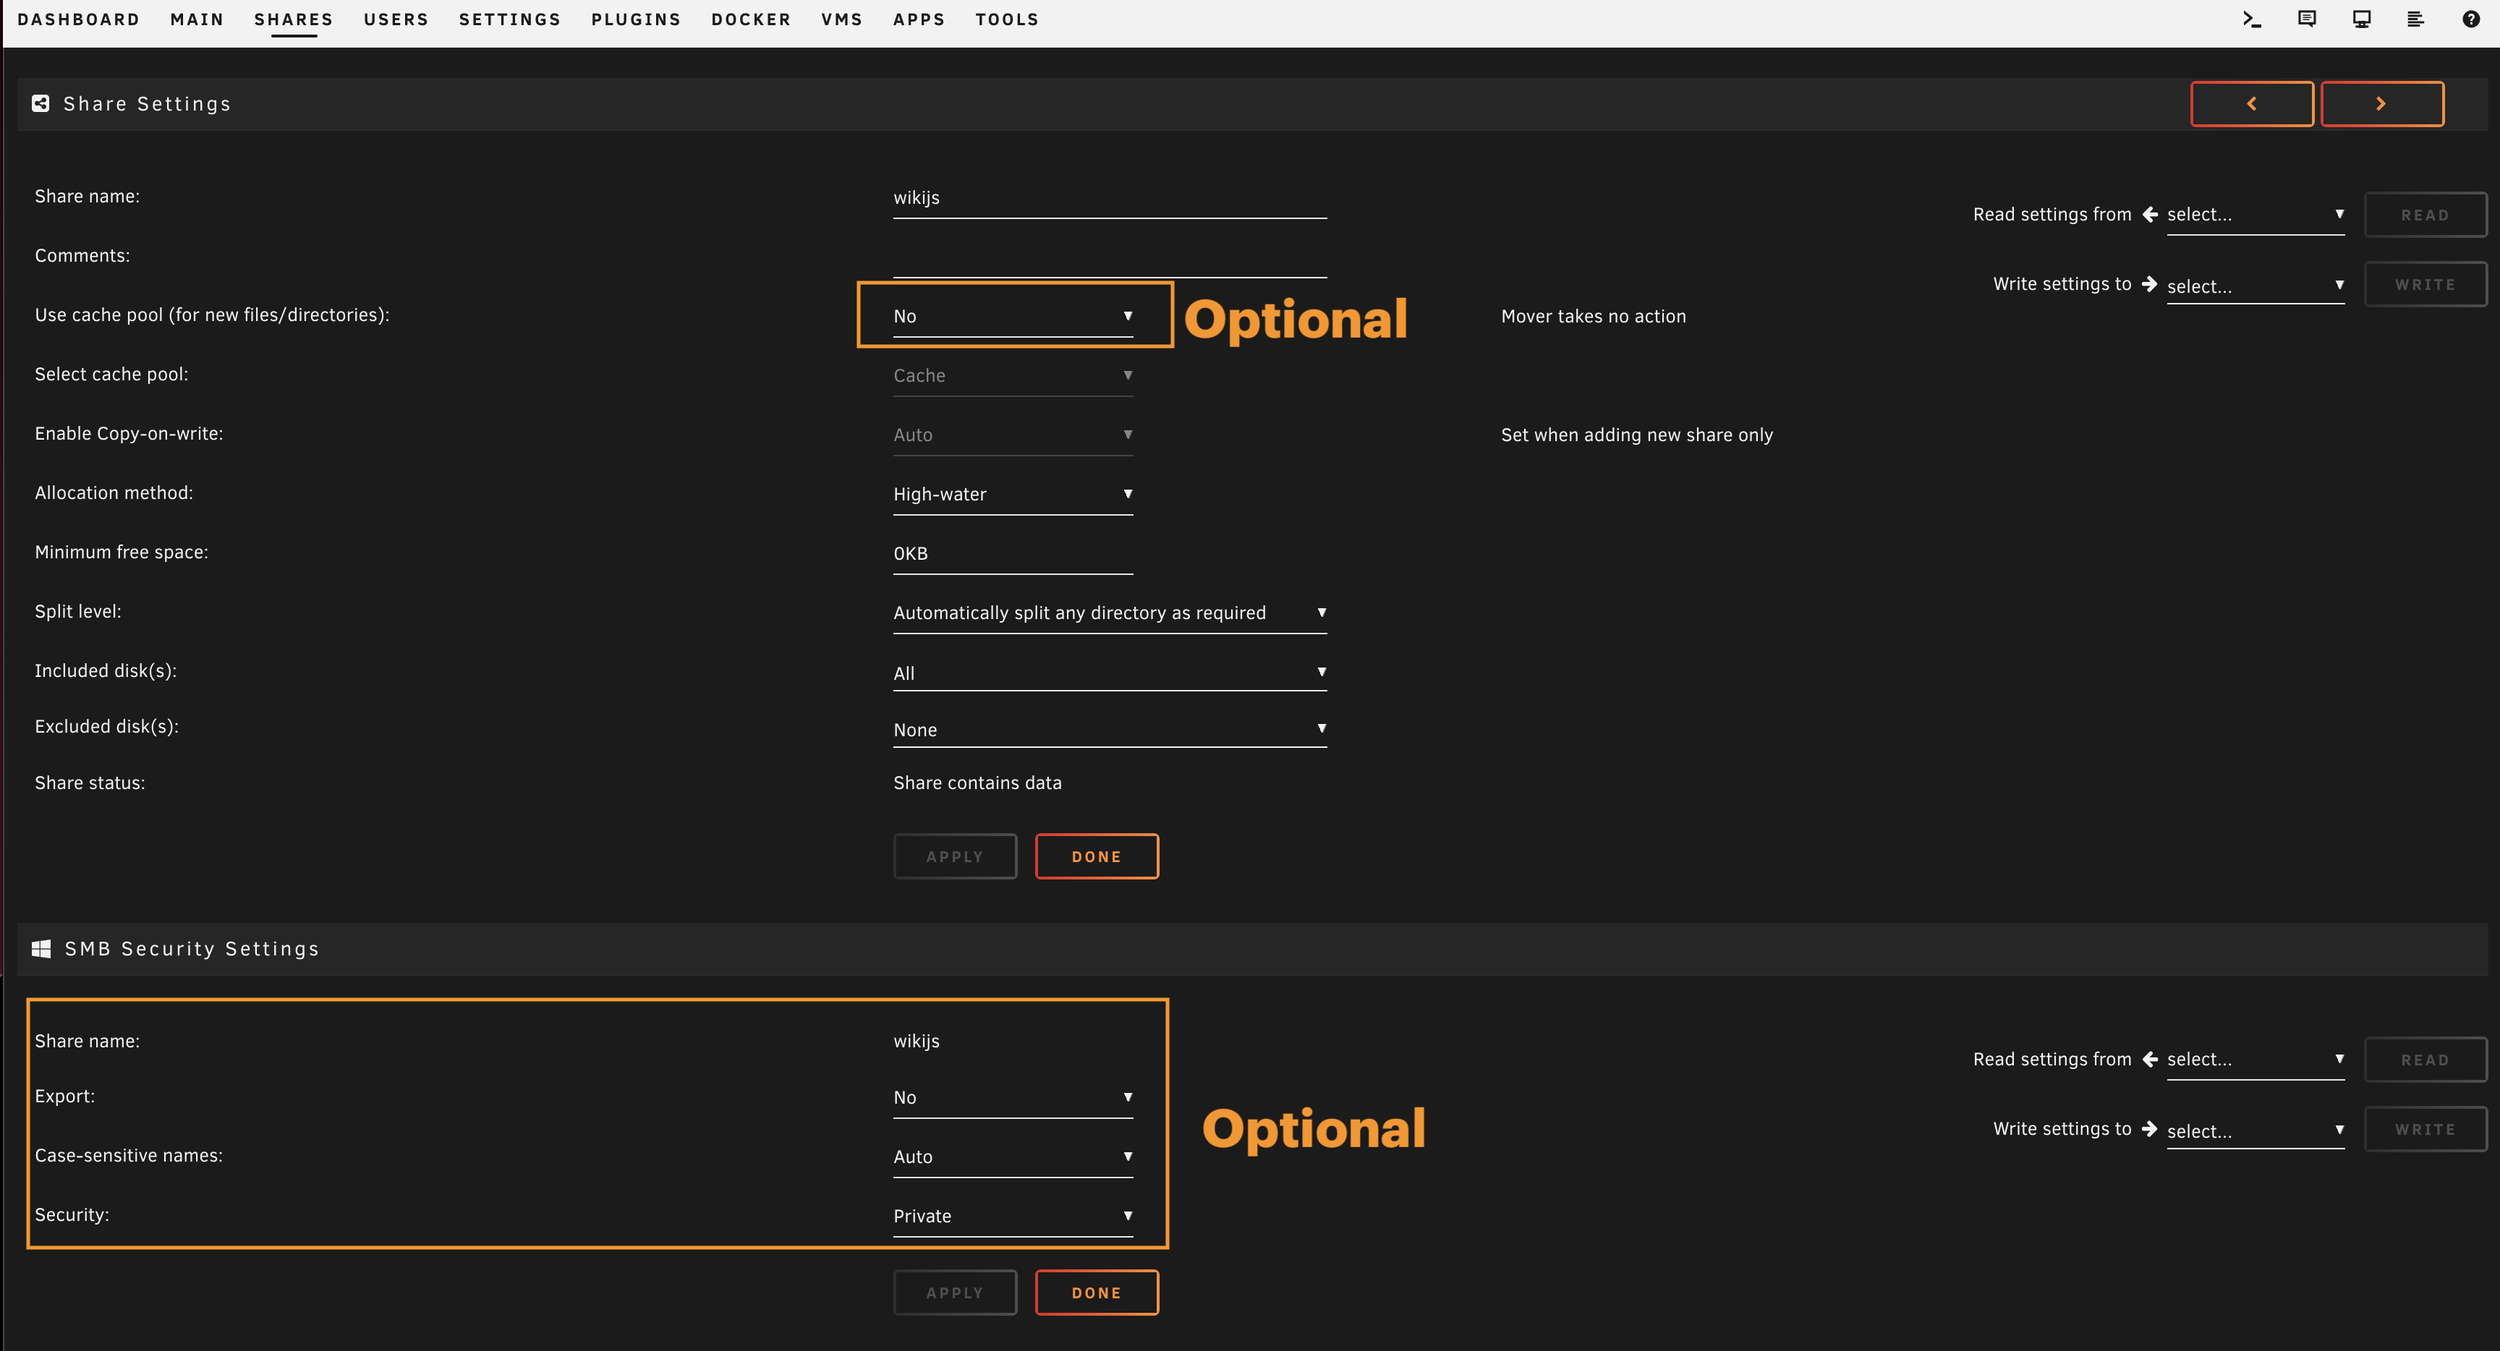
Step 1: Create a “Share” to store all uploads, data, and other content created in wiki.
Step 2: Download & install “wikijs” from linuxserver’s repository. ->example link<-
Change the default port to 80 (for ease of use for other users) ->example link<-
We will manually configure port 80 later, the container will still default to port 3000
Step 3: Create an administrator “email/account”. You can use a real email address or a fake one, like admin@example.com
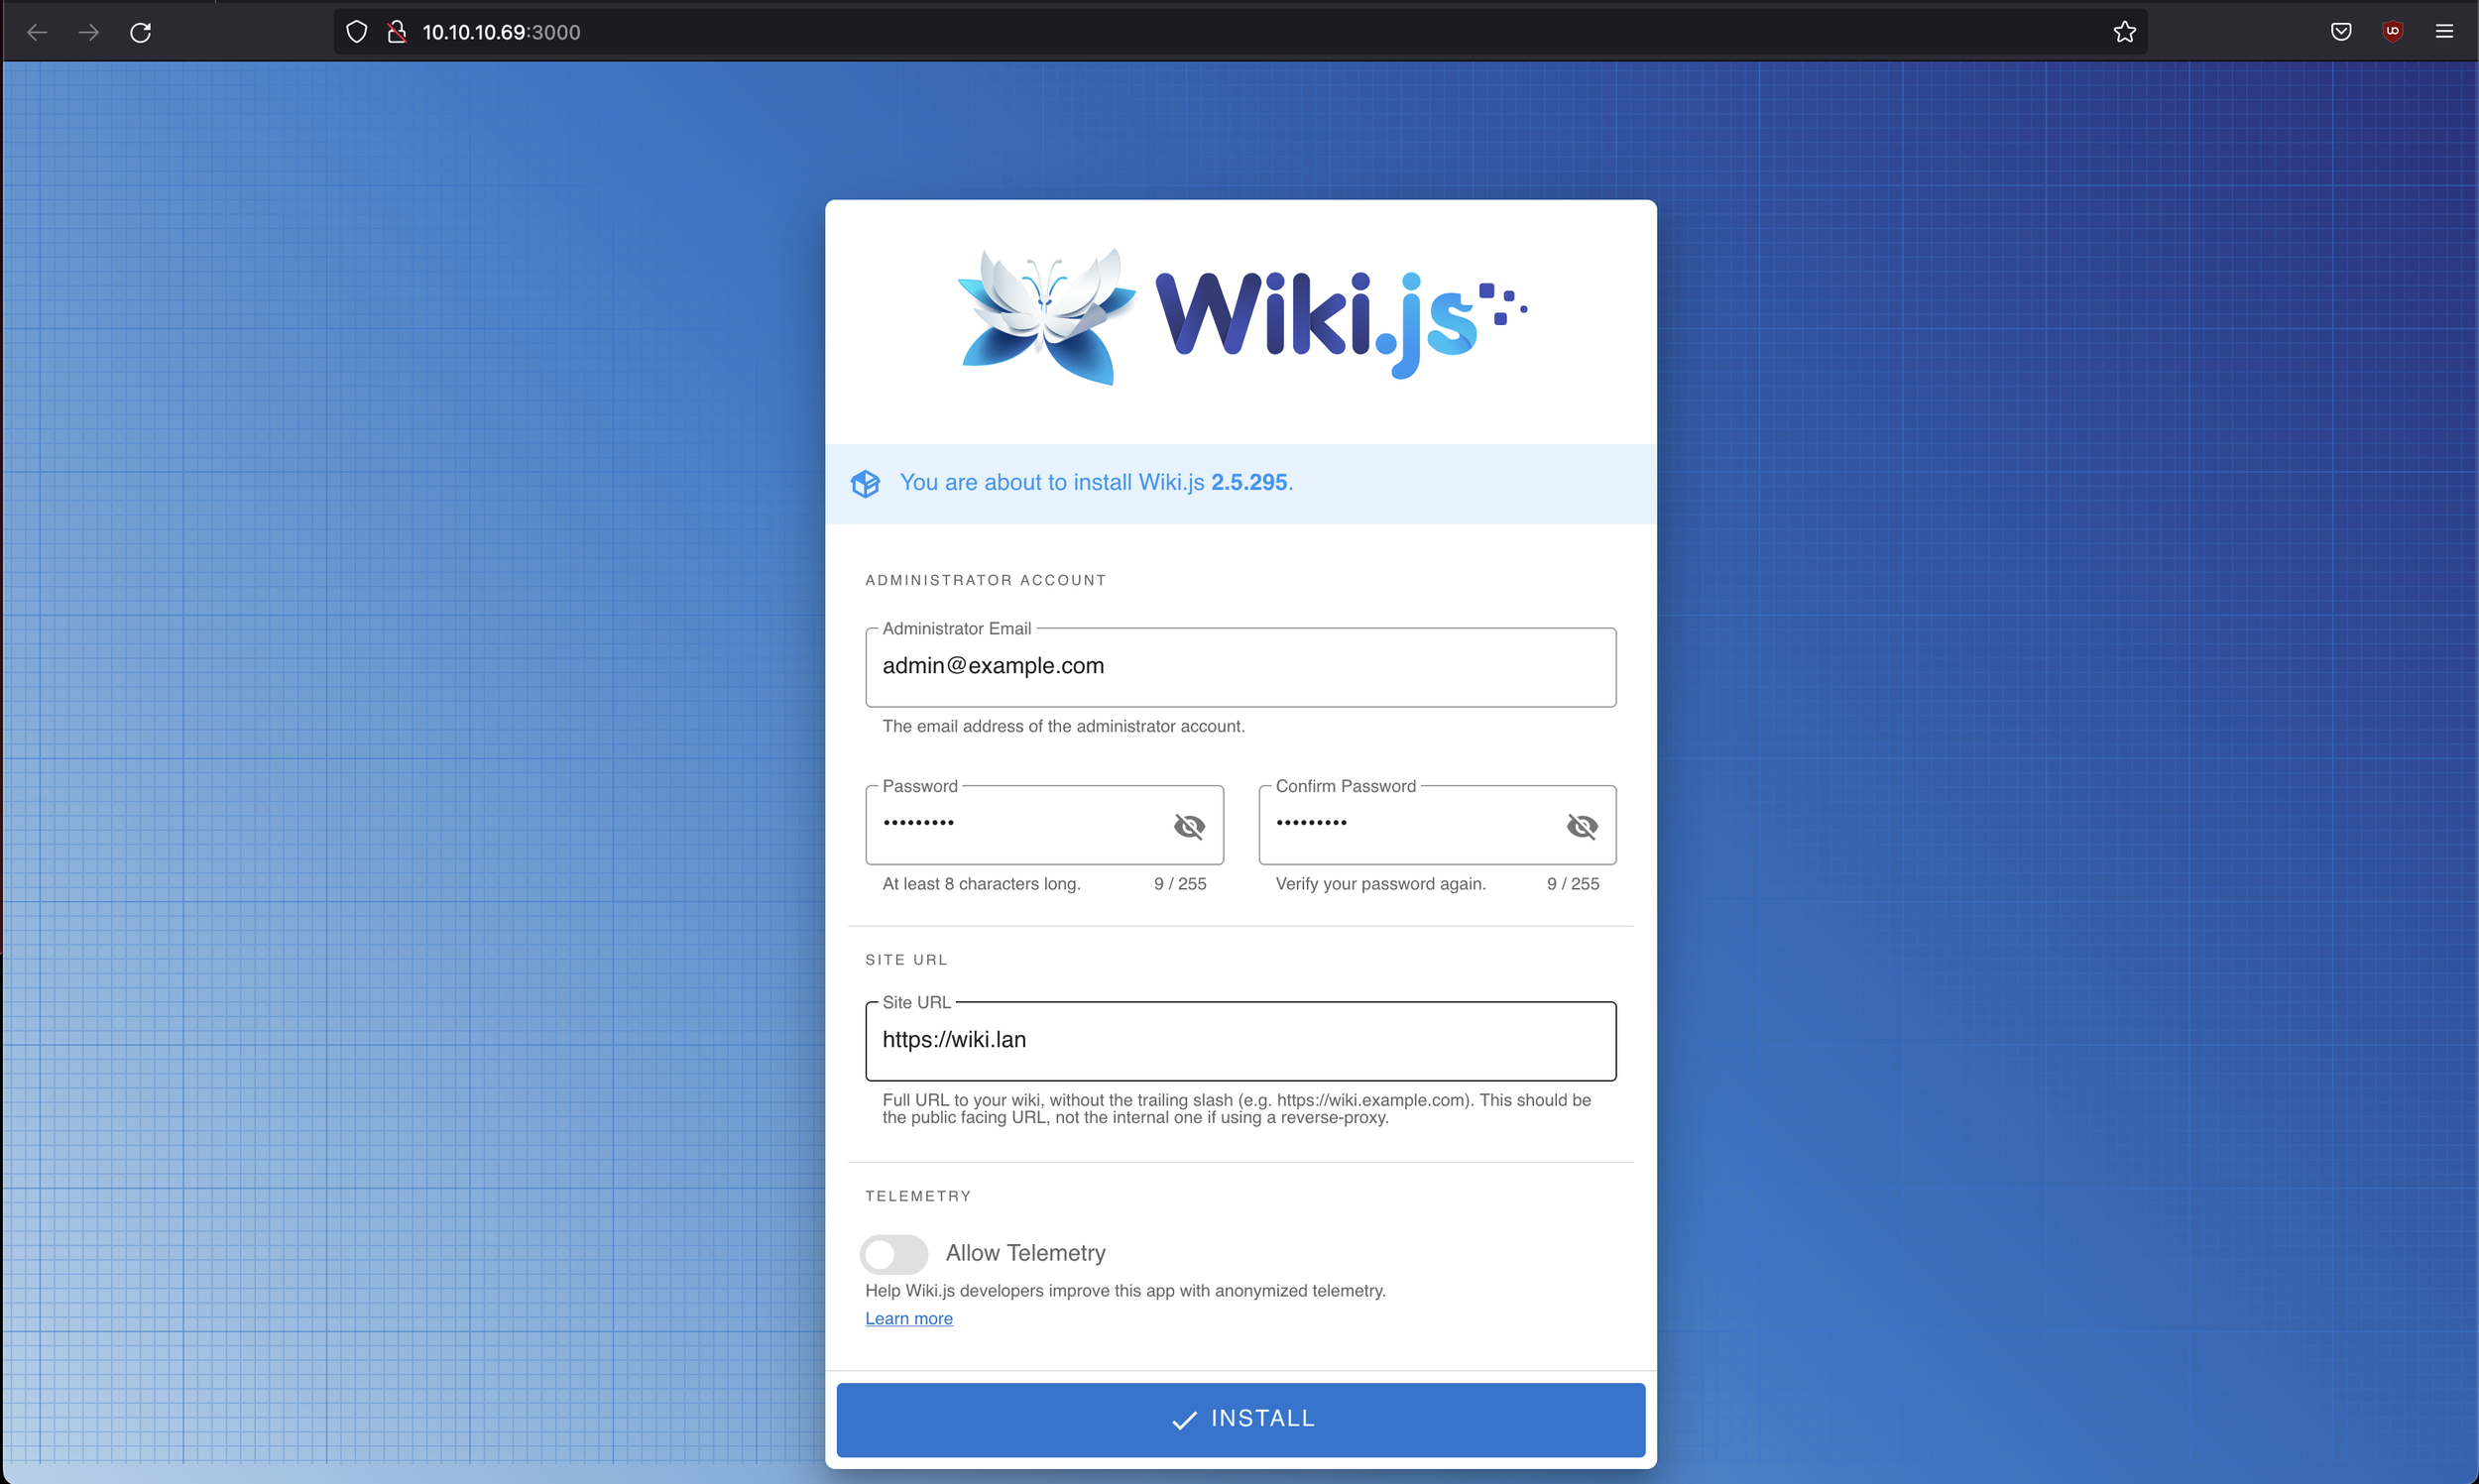
Step 4: You can go ahead and set a “Site URL” like http://wiki.lan or whatever your domain is named.
Step 5: Login with the admin account you just created, admin@example.com
Step 6: At the “Welcome to your wiki!” page go ahead and “Create Home Page” for now. ->example link<-
Step 7: Create and fill out your home page however you see fit. Click the “Create” button in the top right corner of the page when you are done. ->example link<- additional ->example<-

Step 8: In the top right corner click the gear icon.
Step 9: Feel free to edit the main settings for your wiki under the General setting, feel free to create users and groups. ->example link<-
Step 10: Once you are done, go back to Unraid and navigate to the Docker tab. Stop the Wiki container.
Step 11: Open the WebUI Terminal by clicking the “>_” near the top right of the page.
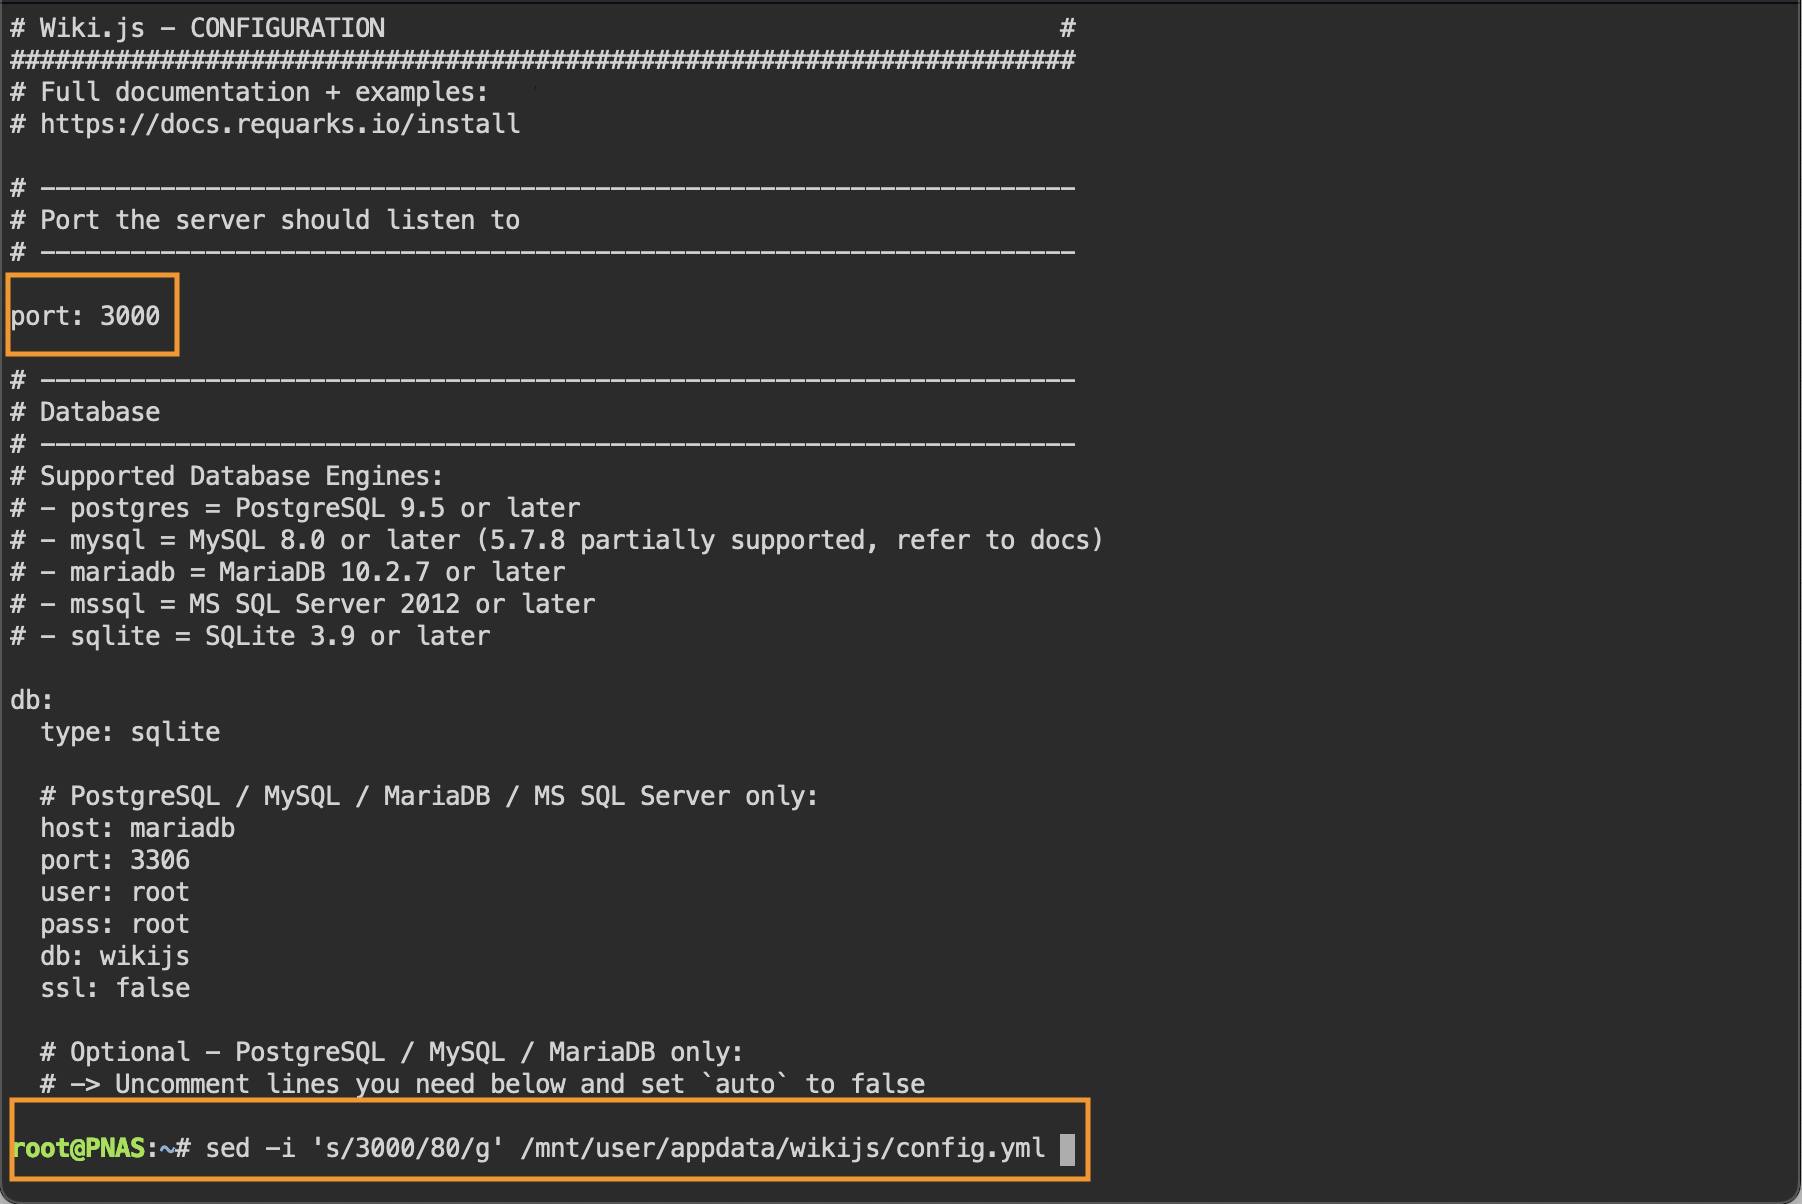
Step 12: Use the following command to change the default port from 3000 to port 80.
sed -i 's/3000/80/g' /mnt/user/appdata/wikijs/config.yml ->example link<-The file should like this when modified correctly ->example link<-
Don’t forget to add a DNS record associating the IP address you set to the url you set of you wiki. Like wiki.lan
Step 13: Start the wikijs container again.
Step 14: You should now be able to type in the IP address or the hostname “wiki.lan” as in my example. ->example link<-
Done, you can now manage your new Wiki server however you see fit from here!

Use Cases
Hosting your own Wiki server can have many advantages, here is a short list just to name a few.
Give your friends information about Game Servers you host, like Minecraft, Counter Strike, Valheim, and so on
Leave a loved one important details about your combined personal information
Document your work environment so you and others have a better understanding of it
Help friends and family members better understand your home network and/or how to access data
Remember IP Addresses for local services like Plex, Jellyfin, NextCloud, Emby, and much much more